Showing posts with label icing. Show all posts

Wednesday, April 3, 2013

Chocolate-Chocolate Cake...or Cupcakes


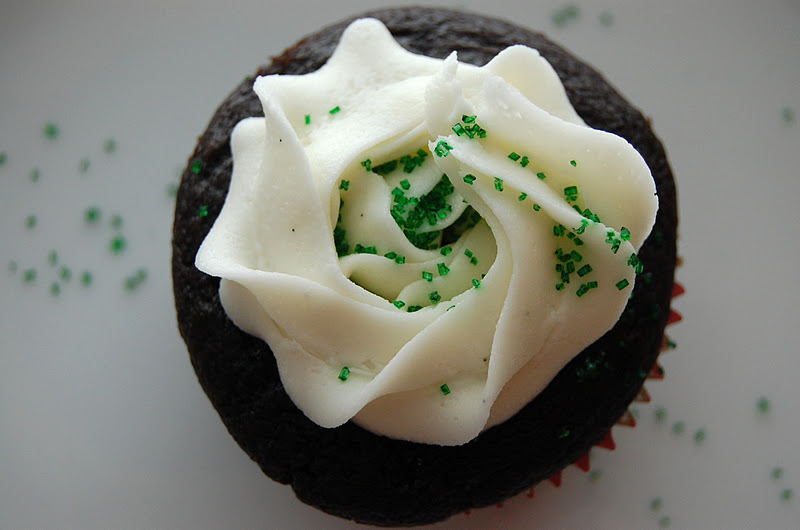
I made this cake last year for my husband's birthday. It works great for cupcakes as well.


For the Cake:
2½ cups + 1 tablespoon all-purpose flour
3 cups granulated sugar
1 cup + 2 tablespoons Dutch-process cocoa powder
1 tablespoon baking soda
1½ teaspoons baking powder
1½ teaspoons salt
3 eggs, at room temperature
1½ cups 1% milk
3 teaspoons apple cider vinegar (into milk 10-15 minutes ahead)
1½ cups strong black coffee, hot
¾ cup vegetable oil
4½ teaspoons Bourbon
vanilla extract

For the Cream cheese Icing:
1 package Cream Cheese-at room temperature

1bag powdered sugar
1 cup unsalted Butter at room temperature
2 teaspoon clear vanilla extract
half and half (to thin icing desired consistency)
(Use food coloring if desired to color white icing)**I used varying amounts of cornmeal blue to achieve the ombre hues.


Directions:

Preheat oven to 375 degrees F. Grease six 8-inch round cake pans, line the bottoms with rounds of parchment paper, grease the parchment, then flour the insides of the pans, tapping out excess; set aside.

In the bowl of an electric mixer, sift together the flour, sugar, cocoa, baking soda, baking powder and salt. In a medium bowl, whisk together the eggs, milk-with vinegar already added 10 minutes ahead), coffee, oil and vanilla.

Add the wet ingredients to the dry ingredients and mix for 2 minutes on medium speed. Scrape the sides and bottom of the bowl and mix for an additional 20 seconds (the batter will be very thin).

Divide the batter evenly among six prepared pans (greased & floured). I use a 1 cup scoop, & add just under two cups to each pan, then divide what’s left over evenly. Bake for 20 minutes and rotate the pans in the oven. Continue to bake until a toothpick inserted into the center of one of the cakes comes out almost clean (with a few moist crumbs), about 12 more minutes. Cool the cakes (in the pans) on wire racks for 20 minutes, then carefully turn them out onto cooling racks to cool completely. I chill the cake prior to icing. Sometimes I also brush each layer with a Chocolate flavored liquor.

Cream Cheese Icing: Beat the butter, cream cheese, and powdered sugar on low speed until blended together, about 1 minute. Add the clear vanilla extract and increase the speed to medium-high; beat for 3 minutes. Stop the mixer, and scrape down the sides. Continue to mix on a low speed until well combined, and light and fluffy. Scrape the bowl as necessary. Ice your cake & serve.


Chocolate-Mocha Layer Easter Cake with Marshmallow and Chocolate-Mocha Icing


This is the cake I made for our Easter dinner. I did modify it some from a Brown Eyed Baker recipe, as well as the frostings. It came out better than I could have imagined. This will now be my go-to recipe for chocolate cake or cupcakes.

Ingredients:

For the Cake:
2½ cups + 1 tablespoon all-purpose flour
3 cups granulated sugar
1 cup + 2 tablespoons Dutch-process cocoa powder (Vaharona, Calebut or otherwise)-I used Calebut from France
1 tablespoon baking soda
1½ teaspoons baking powder
1½ teaspoons salt
3 eggs, at room temperature
1½ cups of 1% milk

3 teaspoons apple cider vinegar (into milk 10-15 minutes ahead)
1½ cups strong black coffee, hot
¾ cup vegetable oil
4½ teaspoons
Bourbon vanilla extract

For the Marshmallow Icing:
1 bag powdered sugar
½ cup Crisco-Butter flavored (or can also use unsalted butter)
2 teaspoon clear vanilla extract
1/2 cup half and half (thin to desired consistency)
1 package Cream Cheese-at room temperature
1/8 cup Monin Marshmallow flavored Syrup
For the Chocolate Mocha Frosting:
2 cups unsalted butter, at room temperature
4 cups powdered sugar
1 cup Mocha powder
1 tablespoon vanilla extract
8 ounces semisweet or dark chocolate, melted and cooled
½ cup heavy cream (until desired consistency is reached)


Directions:
Preheat oven to 375 degrees F. Grease six 8-inch round cake pans, line the bottoms with rounds of parchment paper, grease the parchment, then flour the insides of the pans, tapping out excess; set aside.

In the bowl of an electric mixer, sift together the flour, sugar, cocoa, baking soda, baking powder and salt. In a medium bowl, whisk together the eggs, milk-with vinegar already added 10 minutes ahead), coffee, oil and vanilla.

Add the wet ingredients to the dry ingredients and mix for 2 minutes on medium speed. Scrape the sides and bottom of the bowl and mix for an additional 20 seconds (the batter will be very thin).

Divide the batter evenly among six prepared pans (greased & floured). I use a 1 cup scoop, & add just under two cups to each pan, then divide what’s left over evenly. Bake for 20 minutes and rotate the pans in the oven. Continue to bake until a toothpick inserted into the center of one of the cakes comes out almost clean (with a few moist crumbs), about 12 more minutes. Cool the cakes (in the pans) on wire racks for 20 minutes, then carefully turn them out onto cooling racks to cool completely. I covered each cake with Saran wrap, & stored in the fridge to be iced the next day.

Marshmallow Icing: Beat the butter (shortening), cream cheese, and powdered sugar on low speed until blended together, about 1 minute. Add the vanilla extract and increase the speed to medium-high; beat for 3 minutes. Stop the mixer, add the Marshmallow syrup, continue to mix on a low speed until well combined, and light and fluffy. Scrape the bowl as necessary.

Chocolate-Mocha Icing: Beat the butter and powdered sugar on low speed until blended together, about 1 minute. Add the Mocha powder, and vanilla. Beat on low until well combined, about 1 to 2 minutes. Add the melted chocolate and beat on medium speed until smooth, about 2 minutes. Add the heavy cream and beat on medium-high speed for another minute.

Cake assembly: Place your first layer face-up on a cake plate and cover with one-third of the Marshmallow Icing. Place another cake layer face-up and cover with about ¾ to 1 cup of Chocolate-Mocha Frosting. Repeat, alternating marshmallow and chocolate filling layers, until you come to your cake final layer, which you will place face-down. Frost the entire outside of cake with the remaining
Chocolate-Mocha Frosting.

**Adapted from a Brown Eyed Baker recipe


Wednesday, September 5, 2012

Carrot-Coconut-Pineapple Spice CupCakes


Carrot-Coconut-Pineapple Spice CupCakes
with Rummy Cream Cheese Icing
 

CupCake Ingredients:

1 cup chopped Dates

3/4 pound raw Carrots (about 2 1/2 cups finely grated)

½ cup crushed canned Pineapple tidbits

2 cups All-purpose Flour

1 cup shredded Coconut

1 teaspoon Baking soda

1 1/2 teaspoons Baking powder

1/2 teaspoon Salt

1 1/2 teaspoons ground Cinnamon

1 teaspoon ground Nutmeg

2 teaspoons ground Ginger

4 large eggs

1 & ¼ cup granulated white Sugar

½ cup brown Sugar

1 tablespoon Vanilla

1 cup unsalted Butter (2 sticks)

2 teaspoons Rum extract


Rummy-Cream Cheese Frosting:

1/2 cup unsalted Butter, room temperature (1 stick)

8 ounces  Cream cheese, room temperature

2 ½ cups confectioners (powdered or icing) sugar, sifted

3 teaspoons dark Rum, or rum extract

1 teaspoon ground Nutmeg

Heavy cream to desired thickness (1 teaspoon at a time)


Directions:

Preheat oven to 350 degrees F (180 degrees C) and place rack in center of oven. Butter or spray two - 9 x 2 inch (23 x 5 cm) cake pans and line the bottoms of the pans with a circle of parchment paper. 


Peel and finely grate the carrots. Chop dates in food processor. Drain juice from pineapple tidbits and set aside. Toast coconut until golden brown.


In a separate bowl, whisk together the flour, baking soda, baking powder, salt, and ground cinnamon, nutmeg and ginger.


In bowl of electric mixer (or with a hand mixer), cream the sugar and butter until light and fluffy. Beat in the rum and vanilla extract. Add the flour mixture and beat just until incorporated. With a large rubber spatula fold in the grated carrots, pineapple, coconut and dates.  


Evenly divide the batter into 2 cupcakes pans, totaling 24 cupcakes, each lined with a cupcake liner. Bake approx. 16 minutes, or until a toothpick inserted in the center comes out clean. 


Remove from oven and let cool on a wire rack.

Rummy-Cream Cheese Frosting:

In bowl of electric mixer (or with a hand mixer), beat the cream cheese and butter, on low speed, just until blended with no lumps. Gradually add the sifted powdered sugar and beat, on low speed, until fully incorporated and smooth.  Beat in the vanilla extract, rum, and nutmeg. Gradually add whole cream until you reach the desired consistency and thickness. Pipe into cupcakes.


Monday, August 13, 2012

Apple-Cinnamon Rolls


I usually make these on special occasions, or holidays. It works out perfectly to make them to day before, roll them out, then prep them for the second rise on day #2. Enjoy.

Apple-Cinnamon Rolls

Yields: 12-15 Cinnamon Rolls

**Adapted from a whatscookingamerica recipe

Ingredients:

1 cup 2% milk (heated approximately 1 minute in microwave)

1/4 cup warm water (110 degrees F.)

2 teaspoons pure vanilla extract

1/2 cup butter, room temperature

2 eggs, room temperature and beaten

1/2 teaspoon salt

1/2 cup granulated sugar

1 teaspoon Orange extract

5 cups bread flour

1 tablespoon vital wheat gluten flour (optional)*

3 teaspoons instant active dry yeast


Cinnamon Filling (see recipe below)

Cream Cheese-Butter Frosting (see recipe below)

* The Vital Wheat Gluten helps the sweet bread dough rise better, be more elastic, and easier to roll out.

Standup Mixer Recipe:

In a large bowl or in the bowl of a 5-quart stand mixer, combine all the ingredients in the order given except the Cinnamon Filling and the Butter Frosting. Using a dough hook, mix everything together until a soft dough forms.

Check the dough. It should form a nice elastic ball. If you think the dough is too moist, add additional flour (a tablespoon at a time). The same is true if the dough is looking dry and gnarly. Add warm water (a tablespoon at a time). If you can't judge your dough by looking, stick your finger in and feel the dough. It should be slightly tacky to the touch.

Turn the dough out onto a lightly-oiled surface (I use a nonstick cooking spray), and knead until elastic, approximately 10 minutes. Cover the bowl with plastic wrap and let rise until double in size.

Butter a 9 x 13 x 2-inch baking pan; set aside.

After dough has risen, roll and stretch the dough into approximately a 15 x 24-inchrectangle.

Brush the 1/2 cup softened butter (listed below in the Cinnamon Filling) over the top of the dough with a rubber spatula or a pastry brush. Sprinkle Cinnamon Filling over the butter on the prepared dough. Starting with long edge, roll up dough; pinch seams to seal. NOTE: Rolling the log too tightly will result in cinnamon rolls whose centers pop up above the rest of them as they bake

With a knife, lightly mark roll into 1 1/2-inch section. Use a sharp knife (I like to use a serrated knife and saw very gently) or slide a 12-inch piece of dental floss or heavy thread underneath. By bringing the ends of the floss up and criss-crossing them at the top of each mark, you can cut through the roll by pulling the strings in opposite directions. Place cut side up in prepared baking pan, flattening them only slightly. The unbaked cinnamon rolls should not touch each other before rising and baking. Do not pack the unbaked cinnamon rolls together.


TWO OPTIONS:

Refrigerating or Freezing Unbaked Cinnamon Rolls:

At this point, the cinnamon rolls can be covered with plastic wrap and refrigerated overnight (I've actually made them two days in advance) or frozen for 1 month. Before baking, allow rolls to thaw completely and rise in a warm place if frozen. I have found that I have to take the unbaked frozen cinnamon rolls out of the freezer 10 to 12 hours before planning to bake. I just put the frozen cinnamon rolls (container and rolls) on my counter (not in the refrigerator) overnight for 10 to 12 hours.


If refrigerated, they can be either baked upon removing from the refrigerator or let come to a room temperature (I've done both ways). They do a slow rise overnight and it is not necessary to let them come to room temperature before baking. NOTE: If you rolls are not rising enough after being refrigerated, your yeast may need to be tested. To overcome this, let them rise, while sitting on the counter, until you achieve the desired rising before baking.

Bake Immediately After Making:

Cover and let rise in a warm place for approximately 45 to 60 minutes or until doubled in size (after rising, rolls should be touching each other and the sides of the pan).


Preheat oven to 350 degrees F. for regular oven or 325 degrees F. for a convection oven. 


Bake in a convection oven approximately 15 to 20 minutes until they are a light golden brown.


Baked in a regular oven approximately 20 to 25  minutes in a regular oven until they are a light golden brown.


Remove from oven and let cool slightly. Spread Butter Frosting over the cinnamon rolls while still warm. Best served warm, but room temperature is also great! 


Yields 12-15 cinnamon rolls.


Cinnamon-Apple Filling:

1/2 cup butter, melted or softened (1 stick)

1 cup firmly-packed brown sugar

4 to 5 tablespoons ground cinnamon

2 yellow-red variety apples, peeled, cored, and chopped into small pieces


In a bowl, combine brown sugar and cinnamon. Peel & slice apple, set aside. With a spatula, thinly spread butter on top of dough. Gradually sprinkle cinnamon-sugar mixture on top of butter dough until the entire piece of dough is saturated evenly. Sprinkle apple pieces on top of dough.


Cream Cheese-Butter Frosting:

4 ounces Cream cheese, room temperature

¼  cup unsalted Butter, room temperature

2 cups powdered (Confectioners) Sugar

1 teaspoon pure Vanilla extract

1/8 teaspoon Orange extract

¼ cup Whipping cream or Half n Half

In a medium bowl, combine cream cheese and butter until creamy. Add powdered sugar, vanilla extract, and orange extract until completely mixed and creamy. Gradually add the half and half or whipping cream, while still mixing and thin the icing to the desired consistency. Refrigerate frosting until ready to use and then bring to room temperature before spreading.


Monday, December 19, 2011

Chocolate Peppermint Cupcakes with Vanilla Bean Icing


Chocolate Peppermint Cupcakes with Vanilla Bean Icing

Ingredients
1 3/4 cups all-purpose flour
2 cups sugar
3/4 cups cocoa powder
2 teaspoons baking soda
1 teaspoon baking powder
1 teaspoon kosher salt
1 cup buttermilk
1/2 cup (1 stick) butter-room temperature
2 large eggs, at room temperature
2 teaspoons pure peppermint extract
1 cup semi-sweet chocolate chips (melted)


Directions
1. Preheat the oven to 350 degrees F. Line standard muffin tins with paper liners; set aside.

2. Sift the flour, cocoa, baking soda, baking powder, and salt into the bowl of an electric mixer fitted with a paddle attachment and mix on low speed until combined. In another bowl, cream butter and sugar together until well combined. Add the buttermilk, eggs, and peppermint extract. Melt chocolate chips, and add orange essence. With the mixer on low speed, slowly add the wet ingredients to the dry. With mixer still on low, add the melted chocolate and stir just to combine, scraping the bottom of the bowl with a rubber spatula.

3. Using a large scoop, distribute the batter between 24 muffin wells, filling each well 2/3 full. Bake for 14-15 minutes, or until a cake tester comes out clean. Cool in the pans for 10 minutes, then remove to a cooling rack and cool completely.


Chocolate-Caramel Cupcakes with Vanilla Bean Frosting


Chocolate-Caramel Cupcakes with Vanilla Bean Frosting


For the cupcakes:

1 & 3/4 cups all-purpose flour

3/4 cups high quality cocoa powder

2 teaspoons baking soda

1 teaspoon baking powder

1 teaspoon kosher salt

1 cup buttermilk, shaken

1/2 cup butter-softened to room temperature

2 cups sugar

2 large eggs, at room temperature

2 teaspoons pure vanilla extract

1/2 cup homemade Caramel

½ cup freshly brewed hot coffee


For the Caramel Filling:

**See my recipe for Salted caramel sauce


For the Frosting:

2 sticks butter, softened to room temperature

2 pounds confectioners’ sugar, sifted

Seeds/pulp of ½ of one vanilla bean

1 tablespoon whole cream-adjust upward to obtain the desired consistency


Directions: For the cupcakes

1. Preheat the oven to 350 degrees F. Line standard muffin tins with paper liners; set aside.


2. Sift the flour, cocoa, baking soda, baking powder, and salt into a medium sized bowl, and then set aside. In the bowl of an electric mixer fitted with a paddle attachment, combine the buttermilk, salted caramel, sugar, butter, eggs, and vanilla and mix on low speed until combined. With the mixer on low speed, slowly add the wet ingredients to the dry. With mixer still on low, add the coffee and stir just to combine, scraping the bottom of the bowl with a rubber spatula.


3. Using a large scoop, distribute the batter between 24 muffin wells, filling each well 2/3 full. Bake for 18 to 22 minutes, or until a cake tester comes out clean. Cool in the pans for 10 minutes, then remove to a cooling rack and cool completely.


4. With a very small spoon, dig out a circular well in the center of the cupcake. Then fill the center either by piping the cooled salted caramel into the well, or with a teaspoon. Finish by frosting with vanilla frosting.

For the Icing

In a large mixer, combine the sticks of butter, vanilla, and confection sugar gradually. Slowly add cream until you reach the desired consistency.


**Adapted from a Mybakingaddiction recipe

Sunday, November 6, 2011

Dark Rum Chocolate Cake Balls


Dark Rum Chocolate Cake Balls


(Can also be used to make cake pops)

Cake Balls:

1 box Betty Crocker Super Moist Chocolate Fudge cake Mix

(any ingredients called for by cake mix directions)

½ cup Dark Rum or Kahlua (I used Kahlua last time & it was great) which you will substitute for ½ cup of the water called for in the cake mix

1 teaspoon pure Vanilla

Icing (use the recipe below or you can always use 1 cup pre-made, but honestly the one below will make your cake balls much better).


Icing:

4 oz. cream cheese, softened
4 oz. Mascarpone cheese at room temperature

1/3 stick unsalted butter, room temperature
1 cup confectioners’ sugar
¼ cup Honey

1 tablespoon dark Rum


Coating:

1 large package chocolate Almond Bark-Melted (I also used a vanilla flavored candy coating for the white cake balls, which can be colored with Wilton’s gel edible food coloring for variety).

Any other sprinkles or decorations you would like to add.


Directions:

Preheat oven as directed. Follow cake directions on the back of your box, but reduce water & add additional ingredients. Bake cake according to directions. Remove & cool on a large rack. Once cooled, remove cake and crumble into fine crumbs in a large mixing bowl, removing any crispy or hard edges.


In a large mixing bowl, cream butter, mascarpone, cream cheese, confection sugar, and honey together. Once combined, add rum. Set aside 1 cup. The remaining icing can be refrigerated and used at a later date. Add icing to cake crumbs, mixing well, until the entire cup of icing has been absorbed by cake. Set into freezer to chill for at least 20 minutes.


Remove and measure out equal scoops of cake mix to obtain uniform measurements for cake balls. Once all of your cake balls are measured, roll and form into smooth balls, and set onto parchment paper, and allow to chill in the freezer while you melt your candy coating or Almond bark. Remove cake balls from freezer, and dip into candy coating. I found that setting each cake ball into the coating, then scooping in onto a fork while the excess coating drips off, then pushing it carefully into the parchment paper with a skewer stick cut in half, was the best technique. Add any sprinkles or decoration now so that it will set. I stored the cake balls in Tupperware overnight, but they are good at room temperature, covered for up to 2 days. Enjoy!