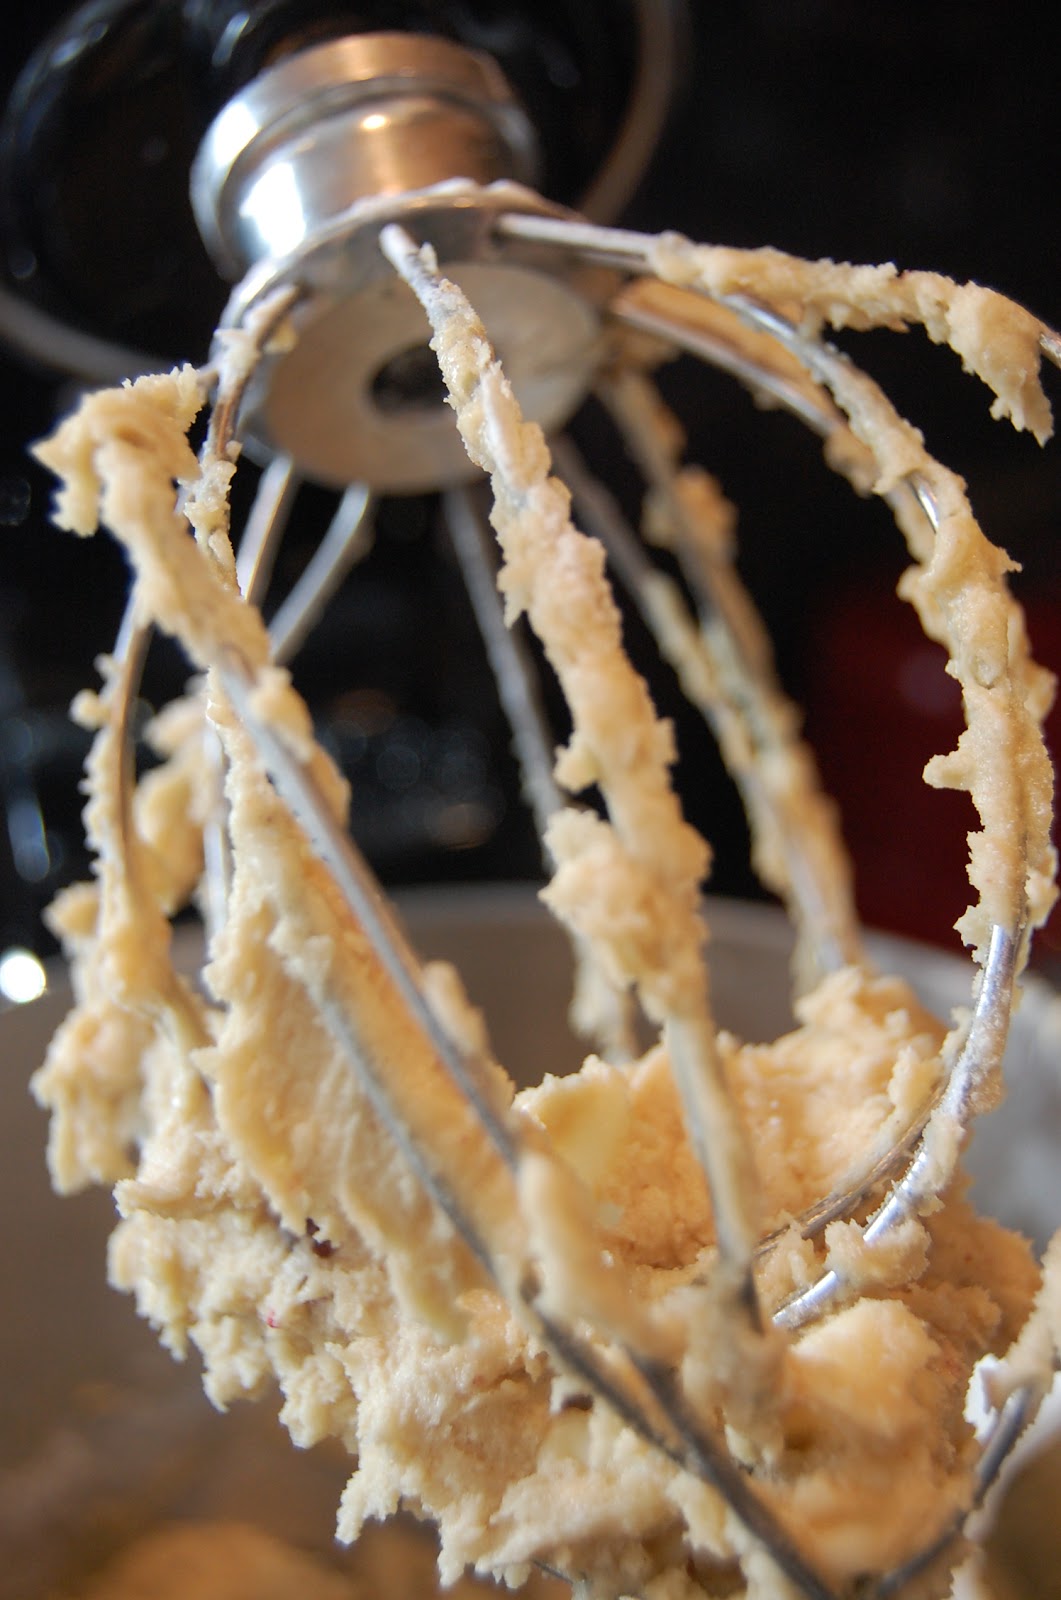
Sunday, March 31, 2013

Carrot-Coconut & Pineapple Spice Cake with Cream Cheese Icing

This is BIG! Real big. Imagine the perfect carrot cake...spicy, nutty, & a hint of fruit. Only now...get ready.....pineapple & coconut too! Wow. And you thought it couldn't get ANY better. Ha! I made this for Easter last year. Warning: You cannot eat just 1 piece! For reals!

Carrot cake is delicious in it of itself, but once you add the pineapple & toasted coconut, you just can't go wrong. Enjoy this variation & let me know how you LOVE it. It serves around 16 good sized portions.

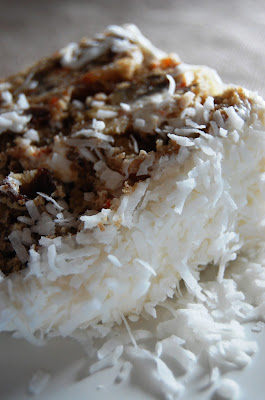


Carrot-Coconut, Date & Pineapple Spice Cake with Cream Cheese Icing

Cake:

1 cup chopped pecans or walnuts

3/4 pound raw carrots (about 2 1/2 cups finely grated)

½ cup crushed canned pineapple tidbits

1 cup chopped Dates

1 cup toasted Coconut flakes + 1 1/2 cups for outside of cake (optional)

1 cup yellow golden raisins

2 cups (260 grams) all-purpose flour

1 teaspoon baking soda

1 1/2 teaspoons baking powder

1/2 teaspoon salt

1 1/2 teaspoons ground cinnamon

2 teaspoons ground Ginger

1 teaspoon Nutmeg

4 large eggs

1 1/2 cups (300 grams) granulated white sugar

1 cup canola oil (or corn oil)

2 teaspoons pure vanilla extract


Cream Cheese Frosting:

1/4 cup unsalted butter, room temperature

8 ounces cream cheese, room temperature

4 cups confectioners (powdered or icing) sugar, sifted

1 teaspoon clear vanilla extract

1 teaspoon finely grated lemon zest


Directions:

Preheat oven to 350 degrees F (180 degrees C) and place rack in center of oven. Butter or spray three - 9 x 2 inch (23 x 5 cm) cake pans and line the bottoms of the pans with a circle of parchment paper. 

Toast the pecans or walnuts for about 8 minutes or until lightly browned and fragrant. Let cool and then chop coarsely. Peel and finely grate the carrots.

In a separate bowl whisk together the flour, baking soda, baking powder, salt, and nutmeg, ginger and ground cinnamon.

In bowl of electric mixer (or with a hand mixer), beat the eggs until frothy (about 1 minute). Gradually add the sugar and beat until the batter is thick and light colored (about 3 - 4 minutes).

Add the oil in a steady stream and then beat in the vanilla extract. Add the flour mixture and beat just until incorporated. With a large rubber spatula fold in the grated carrots, dates, pineapple and chopped nuts.

Evenly divide the batter between the three prepared pans and bake 25 to 30 minutes or until a toothpick inserted in the center comes out clean. 

Remove from oven and let cool on a wire rack. After about 5 -10 minutes invert the cakes onto the wire rack, remove the pans and parchment paper, and then cool completely before frosting. 


Cream Cheese Frosting:

In bowl of electric mixer (or with a hand mixer), beat the cream cheese and butter, on low speed, just until blended with no lumps. Gradually add the sifted powdered sugar and beat, on low speed, until fully incorporated and smooth. Beat in the vanilla extract, and lemon zest.
 
To Assemble:
Place one cake layer onto your serving plate. Arange small peices of parchment paper underneath corners of your cake, so that the icing doesn't get into your cake plate. You can pull these out as soon as you are finished icing the cake. Just don't place them too far underneath your cake, or the weight will cause the cake to break when you remove them.


Spread with a few tablespoons of frosting, then add the next and subsequent layers, repeating the same step. Once all three layers are iced in the middle "dirty" ice the outside of your cake. this layer helps to secure the cake, and mould the exterior, then ice it with the remaining icing a final time. chill until ready to serve. I also used the remaining untoasted coconut to gently place of the outside of my cake. about half the frosting.


Thursday, February 21, 2013

A look back at our Valentine's Day

I managed to find the time to bake and mail out quite a few Valentine's sugar cookies (lemon & almond) just before Valentine's Day. I sent them out as DIY gifts to friends and family back home. I miss them all so much.

Here are a few photos of my beginner's endeavours.


I used the sugar cookie recipe from Sweetopia, as well as her Royal Icing recipe. The icing works like a charm, and although I did experience some spreading with the cookies, I'm fairly sure that it's due to the higher elevation where we live.

Tuesday, October 2, 2012

Fruit and Nut Spiced Granola


Fruit and Nut Spiced Granola

 Ingredients:

5 cups old fashioned Oats

½ stick Butter-unsalted

1 Tablespoon Rum extract

1 Teaspoon ground Ginger

2 Teaspoons ground Cinnamon

½ Teaspoon ground Cloves

1 Teaspoon ground Nutmeg
 
1/2 cup Honey

3/4 cup Brown Sugar

2 Teaspoons pure Vanilla

3/4 cup dried Cranberries

½ cup Peanuts or Sunflower seeds

½ cup raw Almonds

½ cup Yellow or brown Raisins or chopped Dates

1 cup Coconut flakes


Instructions:

Preheat oven to 350 degrees. Grease a large cookie sheet pan with sides.

Over stovetop in a small pot, combine butter, vanilla, rum extract, brown sugar, honey, cinnamon, nutmeg, ginger, and cloves. Melt on medium heat, and then set aside. In a large bowl, combine the old fashioned oats with the butter, sugar & spice mixture. Stir well until all the oats are well coated. Add peanuts, coconut and almonds.


Spread the granola evenly onto your greased baking sheet, & bake at 325 degrees for 20 minutes. Every 5 minutes or so, take the granola out and stir. Bake another 10-15 minutes or until the granola gets crisp and golden brown. Take the granola out and mix in the cranberries and raisins. I let my granola cool in the oven to get extra crispy. Once completely cooled, store in a large airtight container or zip lock bag.


Roasted Vegetable White Pizza


Roasted Vegetable White Pizza & Quick Pizza Dough


Pizza Dough:

1 package active dry yeast
2 tsp. Sugar
1 cup warm water
1 tsp. Salt
2 tsp. Extra-virgin olive oil
2 ½ cups (Approx.) All-purpose white flour, plus more for dusting & rolling pizza

Toppings:

1 Medium Butternut or Acorn Squash-seeds removed & sliced to 1 inch slices

½ bag baby Spinach

½ head Cauliflower

1 large Yellow Onion-sliced

Salt & Pepper

Olive Oil

Red Pepper flakes

2 cups shredded Mozzarella cheese


This really is easy pizza dough to make. Although the directions call for a mixer, I usually hand mix the dough with a large wooden spoon, then set it aside to rise. It seems less cumbersome, faster, and you don’t have a mixer to wash when you‘re done. The entire process took me maybe 10 minutes, & another 45 to rise. I top each pizza with whatever veggies we have in the house, along with some mozzarella cheese.


Pizza Dough:

In the bowl of a standing electric mixer fitted with a dough hook, combine the yeast, sugar, and warm water; stir gently to dissolve. Let the mixture stand until the yeast comes alive and starts to foam, about 5 to 10 minutes.


Turn the mixer on low (or just use your arm & a wooden spoon) and add the salt and 2 tablespoons of olive oil. Add the flour, a little at a time, mixing at the lowest speed until all the flour has been incorporated. Or, if you are mixing with a wooden spoon, just add it all at once & mix until just combined.


When the dough starts to come together, increase the speed to medium; stop the machine
periodically to scrape the dough off the hook. Get a feel for the dough by squeezing a
small amount together: if it's crumbly, add more water; if it's sticky, add more flour - 1
tablespoon at a time. Mix until the dough gathers into a ball, this should take about 5
minutes. Turn the dough out onto a lightly floured surface and fold it over itself a few times;
kneading until it is smooth and elastic. Form the dough into a round and place in a lightly
oiled bowl, turn it over to coat. Cover with plastic wrap or a damp towel and let it rise
in a warm spot (i.e. over a gas pilot light/warm oven) until doubled in size, about 45 min. to 1 hour.


Toppings:

As for the veggies, preheat the oven to 400 degrees. You will want to cook the butternut squash first, as it will take the longest to cook. I don’t peel mine. In fact, once it’s been cooked for about 20-25 minutes drizzled with olive oil, salt & pepper (turn each piece over half way through cooking), the skins become tender enough to eat, & are quite tasty. Remember this is where most of the vitamins are. I get that this isn’t everyone’s preference though. Once the squash is fully cooked, remove from oven, allow to cool slightly, then chop into small bite sized pieces. Set aside.


Wash cauliflower & cut into bite sized pieces, dry with a paper towel & transfer to a greased cookie sheet. Drizzle with olive oil, then toss with salt, pepper & red pepper flakes (optional). Sometimes I sprinkle with a little grated parmesan. Bake for about 20 minutes, tossing frequently. Remove when tender & golden brown. Set aside.


I also added some caramelized yellow onions, which consists of peeling, & cutting into slices a yellow onion, then sautéing it on medium heat in butter until golden brown. Once the onions are ready, I toss the spinach on top, mix, then salt & set aside. The heat from the onions will wilt & cook the spinach.


Once you have followed the directions to prep the pizza dough, cut the large ball of dough in half. This makes two good sized pizza’s that will feed about 3.


This is a good time to stick a pizza stone in the oven and preheat to 425 degrees F.

Once the dough is domed and spongy, turn it out onto a lightly floured counter. Roll and
stretch the dough into a cylinder and divide into 2 equal pieces. Cover and let rest for 10 minutes so it will be easier to roll out (this is an optional step that I rarely follow).

Roll or pat out a piece of dough into a 12 inch circle, about 1/8-inch thick. Dust a pizza
paddle with flour and slide it under the pizza dough. Brush the crust with a thin layer of
olive oil, and top with cheese, then layer with veggies that have been previously cooked. Slide the pizza onto the hot stone in the oven and bake for 12 to 15 minutes, until the crust is golden and crisp. Repeat with the remaining dough. If you don’t have a pizza stone, don’t fret. I frequently use a metal cookie sheet, greased with a little olive oil. Enjoy & be creative!!


Sunday, September 30, 2012

Parmesan-Herb Biscuits


Parmesan-Herb Biscuits

Adapted from a Williams-Sonoma recipe


Ingredients:

2 cups all-purpose flour, plus more as needed

1 Tbs. baking Powder

1 1/4 tsp. kosher Salt

2 tsp. Sugar

8 Tbs. (1 stick) cold unsalted butter, cut into 8 pieces

1 cup grated Parmigiano-Reggiano cheese

1/4 teaspoon Garlic powder

2 Tbs. chopped fresh flat-leaf Parsley

3/4 cup plus 2 Tbs. Buttermilk

2 Tbs. unsalted Butter, melted (for brushing)


Directions:

To make the biscuits: In a large bowl, whisk together the 2 cups flour, the baking powder, salt and sugar. Using a pastry blender or 2 knives, cut in the butter until pea-size crumbs form, then use your fingers to smear the butter into flat disks. Stir in the cheese, chives and parsley. Stir in the buttermilk until the dough just comes together.


Transfer the dough to a floured work surface and roll out into a 9 1/2-by-11-inch rectangle. Fold the dough into thirds, rotate 90 degrees and roll out into the same-size rectangle. Fold again into thirds, rotate 90 degrees and roll out into a 7-by-9 1/2-inch rectangle about 1/2 inch thick. Using a floured 2 1/2-inch biscuit cutter, cut out the biscuits. Gather up the scraps, reroll the dough and cut out more biscuits. You should have 13 biscuits.


Preheat an oven to 425ºF.


Arrange the biscuits on a greased baking sheet and brush with the melted butter. Transfer to the oven and bake until the biscuits are golden brown and a toothpick inserted into the center of a biscuit comes out clean, 20 to 25 minutes. Let rest for 15 minutes before serving. Serves 8 to 10.


Friday, September 28, 2012

32 Weeks..and a Finished Nursery.(from a couple weeks ago)

I am actually just about 34 weeks now, but here are some photos from a few weeks ago of our finished nursery, and some recent belly pics from 32 weeks.


Due to unforeseen events, we were admitted to the hospital the Wednesday after these were taken for pre-term labor, and spent 5 days there trying to get my labor stopped. I am happy to report that I am resting, the babies are healthy, and I will be on bedrest until I deliver.

On the upside-the hubby finished our nursery, and I must say it's totally awesome! Our jungle themed ideas really came together. Especially once our mural was up. Check out some of the photos below:


Since I am on bedrest, I am trying to catch up on some blogging (yes, I have been a bad, bad girl), since I can no longer cook. I will however be posting some of the recent recipes I have cooked that I have been saving up.

The goal is to get to at least 35 weeks, but 37 would be preferable. We toured the NICU before discharging from the hospital, and frankly, it scared the hell out of us. We wouldn't want the babies to suffer unnecessarily, or have to deal with feeding, or breathing issues, just to name a few. So for now I am completely focused on hibernating and incubating these babies, until they decide they are ready to meet the world. We are so excited!!!!!

Saturday, September 8, 2012

Lemon-Almond Sugar Cookies


Lemon-Almond Sugar Cookies

*makes 4 dozen-1 tablespoon cookies


Ingredients:

2 cups granulated Sugar

Zest of two large Lemons

1 cup unsalted butter, room temperature (2 sticks)

2 large eggs, room temperature

1 tablespoon Almond extract

1 tablespoon Lemon extract

½ teaspoon sea salt

½ teaspoon Baking powder

½ teaspoon Baking soda

3 ¼ cups All-purpose Flour

½ cup powdered Sugar


Directions:

I adapted this from a Slow Roasted Italian recipe (I only changed a couple minor things), but found that the increase in lemon flavor was simply spectacular.


Preheat oven 350°F. Prepare baking sheets with parchment paper.  Set aside.


In the bowl of a stand mixer or an electric mixer combine sugar and lemon zest, until sugar is coated in lemon.


Add butter, cream until light and fluffy, approximately 2 minutes.  Add almond extract, lemon extract and eggs.  Mix until combined.  Scrape sides down as needed.  Add salt, powder, soda and flour.  Mix until combined.  Scrape sides of bowl as necessary.


Pour powdered sugar onto a large plate. Scoop 1 tablespoon portions of dough and roll into a ball.  Roll in powdered sugar until coated.  Place on baking sheet and repeat with remaining dough.  I made 12 per sheet, but you could easily fit 18.


I baked mine for 14 minutes, but the recommended time is only 9-11 minutes. We live in a higher altitude, so I attributed that to the longer cooking time. Make sure once you remove from the cookie sheet you allow to cool on a cookie rack, then sprinkle with more powdered sugar.


Wednesday, September 5, 2012

Carrot-Coconut-Pineapple Spice CupCakes


Carrot-Coconut-Pineapple Spice CupCakes
with Rummy Cream Cheese Icing
 

CupCake Ingredients:

1 cup chopped Dates

3/4 pound raw Carrots (about 2 1/2 cups finely grated)

½ cup crushed canned Pineapple tidbits

2 cups All-purpose Flour

1 cup shredded Coconut

1 teaspoon Baking soda

1 1/2 teaspoons Baking powder

1/2 teaspoon Salt

1 1/2 teaspoons ground Cinnamon

1 teaspoon ground Nutmeg

2 teaspoons ground Ginger

4 large eggs

1 & ¼ cup granulated white Sugar

½ cup brown Sugar

1 tablespoon Vanilla

1 cup unsalted Butter (2 sticks)

2 teaspoons Rum extract


Rummy-Cream Cheese Frosting:

1/2 cup unsalted Butter, room temperature (1 stick)

8 ounces  Cream cheese, room temperature

2 ½ cups confectioners (powdered or icing) sugar, sifted

3 teaspoons dark Rum, or rum extract

1 teaspoon ground Nutmeg

Heavy cream to desired thickness (1 teaspoon at a time)


Directions:

Preheat oven to 350 degrees F (180 degrees C) and place rack in center of oven. Butter or spray two - 9 x 2 inch (23 x 5 cm) cake pans and line the bottoms of the pans with a circle of parchment paper. 


Peel and finely grate the carrots. Chop dates in food processor. Drain juice from pineapple tidbits and set aside. Toast coconut until golden brown.


In a separate bowl, whisk together the flour, baking soda, baking powder, salt, and ground cinnamon, nutmeg and ginger.


In bowl of electric mixer (or with a hand mixer), cream the sugar and butter until light and fluffy. Beat in the rum and vanilla extract. Add the flour mixture and beat just until incorporated. With a large rubber spatula fold in the grated carrots, pineapple, coconut and dates.  


Evenly divide the batter into 2 cupcakes pans, totaling 24 cupcakes, each lined with a cupcake liner. Bake approx. 16 minutes, or until a toothpick inserted in the center comes out clean. 


Remove from oven and let cool on a wire rack.

Rummy-Cream Cheese Frosting:

In bowl of electric mixer (or with a hand mixer), beat the cream cheese and butter, on low speed, just until blended with no lumps. Gradually add the sifted powdered sugar and beat, on low speed, until fully incorporated and smooth.  Beat in the vanilla extract, rum, and nutmeg. Gradually add whole cream until you reach the desired consistency and thickness. Pipe into cupcakes.


Monday, August 13, 2012

Sate Chicken Skewers

This is BY FAR one of my family's favorite meals. We usually grill this in the summer, then sit outside in the evening and enjoy a delcious meal together. The skewers are healthy, and low in fat, yet highly flavorful. We hope you enjoy it too.


Sate Chicken Skewers with Spicy Peanut Sauce

**Inspired by a Rasa Malaysia Recipe


Ingredients:

2 ½ pounds skinless and boneless chicken breast, sliced into chicken tender sized slices

30 wooden skewers, pre-soaked in water for 30 minutes

2 Cucumbers, sliced

Marinade:

3 tablespoons Fish sauce

4 whole cloves of Garlic

2 teaspoons sweet Soy sauce

1 teaspoon Soy sauce

2.5 teaspoons Coconut or Palm Sugar

1/4 teaspoon white Pepper

1 teaspoon Turmeric

1 teaspoon Coriander

4 tablespoons Red Curry Paste

1 cup Coconut milk

1/8 cup Olive (oil optional)

Peanut Sauce:

2 teaspoons Red Curry paste

2 tablespoons Fish sauce

3 tablespoons Tamarind puree

3 tablespoons creamy Peanut butter

1 tablespoon Palm or Coconut sugar

1 teaspoon paprika powder

2 whole cloves Garlic

2 cups Coconut milk

1 cup crushed Peanuts

Directions:

Prepare the marinade by adding all your ingredients to a blender, blending on high until smooth and creamy.

Slice the chicken breasts, then add to a large zip lock bag, then mix in the Marinade and make sure all pieces are coated. Marinate the meat overnight, or at least 4 hours in a large zip lock bag in the refrigerator.


Prepare the peanut sauce by adding all the Peanut Sauce ingredients in a 2 quart sauce pan. Mix well and cook on medium heat. Stir the sauce while cooking. Turn off the heat when the sauce is slightly thickened. It takes about 10-15 minutes.


Take out the marinated chicken from the refrigerator. Insert the wooden skewers through the meat lengthwise. Grill the Sate for 4 minutes on each side or until desired tenderness. I grill them on the lowest heat, turning frequently so they don't burn.  

Serve with Peanut Sauce and peeled and sliced cucumbers, and Thai sticky rice.


Green Papaya Salad

We are currently living in an area that doesn't have green papaya. However, someone told me to use cucumber as a substitute. I actually tried it this time, and it worked well. The texture is pretty much the same, yet doesn't retain its firmness as well.


Green Papaya Salad

 Ingredients:  

1 clove Garlic

1 or 2 red Thai Chilies

2 tablespoons dried Shrimp

Thai palm sugar, to taste

1/4 cup roasted Peanuts

2 cups green Papaya strands

6 cherry Tomatoes

Juice of 1 fresh lime- to taste

Soy sauce

Fish sauce, to taste


Method:

Pound the garlic and bird’s eye chilies until they form a smooth paste.

Add the dried shrimp and pound until the pieces are broken up, but not completely pulverized.

Add the palm sugar (cut into small pieces), maybe 2-3 teaspoons at first. Add the peanuts and lightly pound until they are broken into small pieces, but not to the point where they form a thick paste.


Add the papaya and tomatoes and pound on them until the tomatoes begin to burst. Add a few teaspoons of fish sauce and a couple of teaspoons of lime juice to the mix.

Adjust taste by adding additional palm sugar, soy sauce, lime juice and fish sauce. Serve cold immediately.

Apple-Cinnamon Rolls


I usually make these on special occasions, or holidays. It works out perfectly to make them to day before, roll them out, then prep them for the second rise on day #2. Enjoy.

Apple-Cinnamon Rolls

Yields: 12-15 Cinnamon Rolls

**Adapted from a whatscookingamerica recipe

Ingredients:

1 cup 2% milk (heated approximately 1 minute in microwave)

1/4 cup warm water (110 degrees F.)

2 teaspoons pure vanilla extract

1/2 cup butter, room temperature

2 eggs, room temperature and beaten

1/2 teaspoon salt

1/2 cup granulated sugar

1 teaspoon Orange extract

5 cups bread flour

1 tablespoon vital wheat gluten flour (optional)*

3 teaspoons instant active dry yeast


Cinnamon Filling (see recipe below)

Cream Cheese-Butter Frosting (see recipe below)

* The Vital Wheat Gluten helps the sweet bread dough rise better, be more elastic, and easier to roll out.

Standup Mixer Recipe:

In a large bowl or in the bowl of a 5-quart stand mixer, combine all the ingredients in the order given except the Cinnamon Filling and the Butter Frosting. Using a dough hook, mix everything together until a soft dough forms.

Check the dough. It should form a nice elastic ball. If you think the dough is too moist, add additional flour (a tablespoon at a time). The same is true if the dough is looking dry and gnarly. Add warm water (a tablespoon at a time). If you can't judge your dough by looking, stick your finger in and feel the dough. It should be slightly tacky to the touch.

Turn the dough out onto a lightly-oiled surface (I use a nonstick cooking spray), and knead until elastic, approximately 10 minutes. Cover the bowl with plastic wrap and let rise until double in size.

Butter a 9 x 13 x 2-inch baking pan; set aside.

After dough has risen, roll and stretch the dough into approximately a 15 x 24-inchrectangle.

Brush the 1/2 cup softened butter (listed below in the Cinnamon Filling) over the top of the dough with a rubber spatula or a pastry brush. Sprinkle Cinnamon Filling over the butter on the prepared dough. Starting with long edge, roll up dough; pinch seams to seal. NOTE: Rolling the log too tightly will result in cinnamon rolls whose centers pop up above the rest of them as they bake

With a knife, lightly mark roll into 1 1/2-inch section. Use a sharp knife (I like to use a serrated knife and saw very gently) or slide a 12-inch piece of dental floss or heavy thread underneath. By bringing the ends of the floss up and criss-crossing them at the top of each mark, you can cut through the roll by pulling the strings in opposite directions. Place cut side up in prepared baking pan, flattening them only slightly. The unbaked cinnamon rolls should not touch each other before rising and baking. Do not pack the unbaked cinnamon rolls together.


TWO OPTIONS:

Refrigerating or Freezing Unbaked Cinnamon Rolls:

At this point, the cinnamon rolls can be covered with plastic wrap and refrigerated overnight (I've actually made them two days in advance) or frozen for 1 month. Before baking, allow rolls to thaw completely and rise in a warm place if frozen. I have found that I have to take the unbaked frozen cinnamon rolls out of the freezer 10 to 12 hours before planning to bake. I just put the frozen cinnamon rolls (container and rolls) on my counter (not in the refrigerator) overnight for 10 to 12 hours.


If refrigerated, they can be either baked upon removing from the refrigerator or let come to a room temperature (I've done both ways). They do a slow rise overnight and it is not necessary to let them come to room temperature before baking. NOTE: If you rolls are not rising enough after being refrigerated, your yeast may need to be tested. To overcome this, let them rise, while sitting on the counter, until you achieve the desired rising before baking.

Bake Immediately After Making:

Cover and let rise in a warm place for approximately 45 to 60 minutes or until doubled in size (after rising, rolls should be touching each other and the sides of the pan).


Preheat oven to 350 degrees F. for regular oven or 325 degrees F. for a convection oven. 


Bake in a convection oven approximately 15 to 20 minutes until they are a light golden brown.


Baked in a regular oven approximately 20 to 25  minutes in a regular oven until they are a light golden brown.


Remove from oven and let cool slightly. Spread Butter Frosting over the cinnamon rolls while still warm. Best served warm, but room temperature is also great! 


Yields 12-15 cinnamon rolls.


Cinnamon-Apple Filling:

1/2 cup butter, melted or softened (1 stick)

1 cup firmly-packed brown sugar

4 to 5 tablespoons ground cinnamon

2 yellow-red variety apples, peeled, cored, and chopped into small pieces


In a bowl, combine brown sugar and cinnamon. Peel & slice apple, set aside. With a spatula, thinly spread butter on top of dough. Gradually sprinkle cinnamon-sugar mixture on top of butter dough until the entire piece of dough is saturated evenly. Sprinkle apple pieces on top of dough.


Cream Cheese-Butter Frosting:

4 ounces Cream cheese, room temperature

¼  cup unsalted Butter, room temperature

2 cups powdered (Confectioners) Sugar

1 teaspoon pure Vanilla extract

1/8 teaspoon Orange extract

¼ cup Whipping cream or Half n Half

In a medium bowl, combine cream cheese and butter until creamy. Add powdered sugar, vanilla extract, and orange extract until completely mixed and creamy. Gradually add the half and half or whipping cream, while still mixing and thin the icing to the desired consistency. Refrigerate frosting until ready to use and then bring to room temperature before spreading.